Looking for your next weekend project? You won’t believe how easy these terra-cotta pot upgrades are. The only challenging part will be keeping the plants alive! Paint, build, dip, or hang your pots to become the coolest planter on the block before Monday.
1. Chandelier Planter Tutorial
Yes, these really are terra-cotta pots — complete with saucers as a matter of fact! Roeshel created this lovely planter with a thrifted chandelier, pots, outdoor spray paint, and a few miscellaneous craft items. If your chandelier has electrical wiring, you will need some wire cutters to remove it. But it’s OK. Her tutorial shows you how to do that too!
Image may be NSFW.
Clik here to view.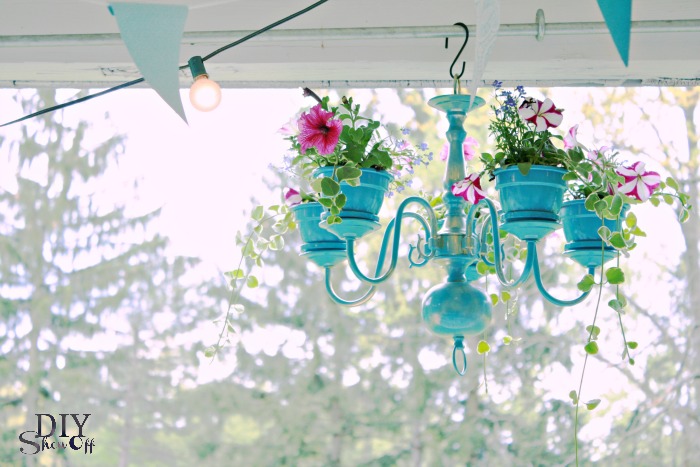
Image Via: DIY Show Off
2. Copper Leaf Planters
Like Heather, you may feel like your moon cacti needs something a little more special than a plain terra-cotta pot. Check out how she painted and copper-leafed her pots to make a beautiful statement. She’ll even show you how to redo your leafing when you use the wrong kind of tape.
Image may be NSFW.
Clik here to view.
Image Via: Woods of Bell Trees
3. Dip Dye Succulent Pots
Succulents need a home that has a bit of edge. At least that’s what Jenni from I Spy DIY thinks. She used water and dye to create this dip-dye effect. This project is so quick, you’ll spend more time setting up and tearing down!
Image may be NSFW.
Clik here to view.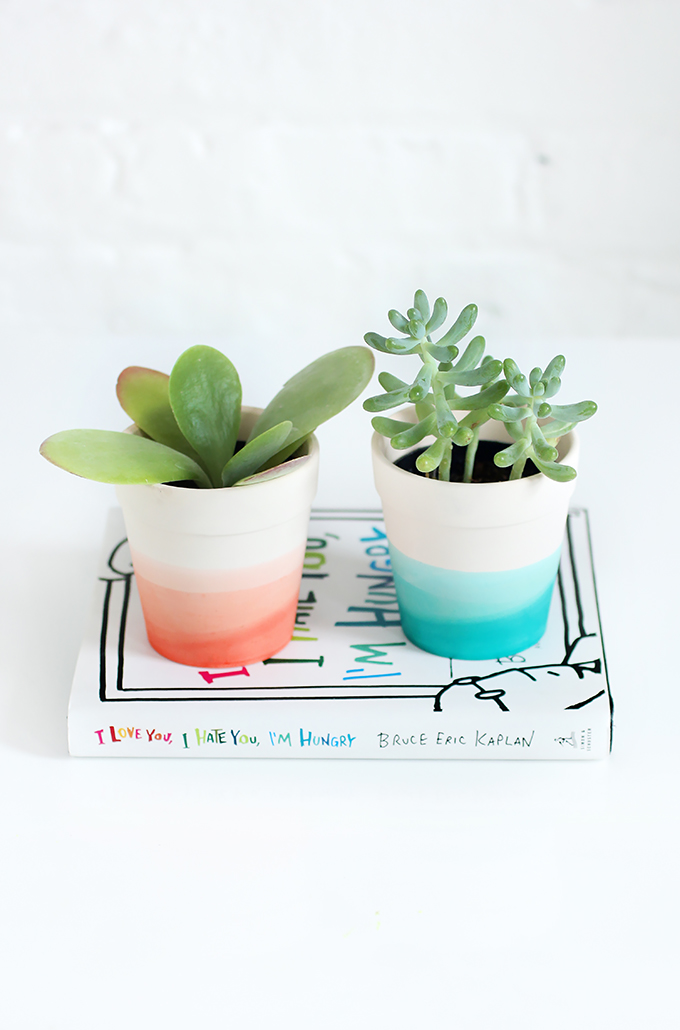
Image Via: I Spy DIY
4. Gold Foil Lettering and Glitter
Add a touch of class to your containers by adhering golden accents. Kellie created these planters (and a cute garden gnome) by doing just that over at her blog, Nest of Posies. She used dollar-store pots, paint, decoupage medium and glitter or gold foil printable paper to create these classy — and comical — containers for her plants.
Image may be NSFW.
Clik here to view.
Image Via: Nest of Posies
5. DIY Color Block Terra-Cotta Pot
Who knew a wooden spoon project could inspire such a lovely group of planters? Amanda saw a shellac technique used on some cooking utensils and thought the process could be replicated via terra-cotta. How right she was! Follow how she did it at her blog, Wit and Whistle.
Image may be NSFW.
Clik here to view.
Image Via: Wit and Whistle
6. Ombre Terra-Cotta Pots
The hardest part of creating these pretty DIY ombre pots will be waiting for the paint to dry. Sarah Jane took two terra-cotta pots and four colors of spray paint to make this fun project. Simply spray, flip, and repeat, alternating colors. See the whole process here!
Image may be NSFW.
Clik here to view.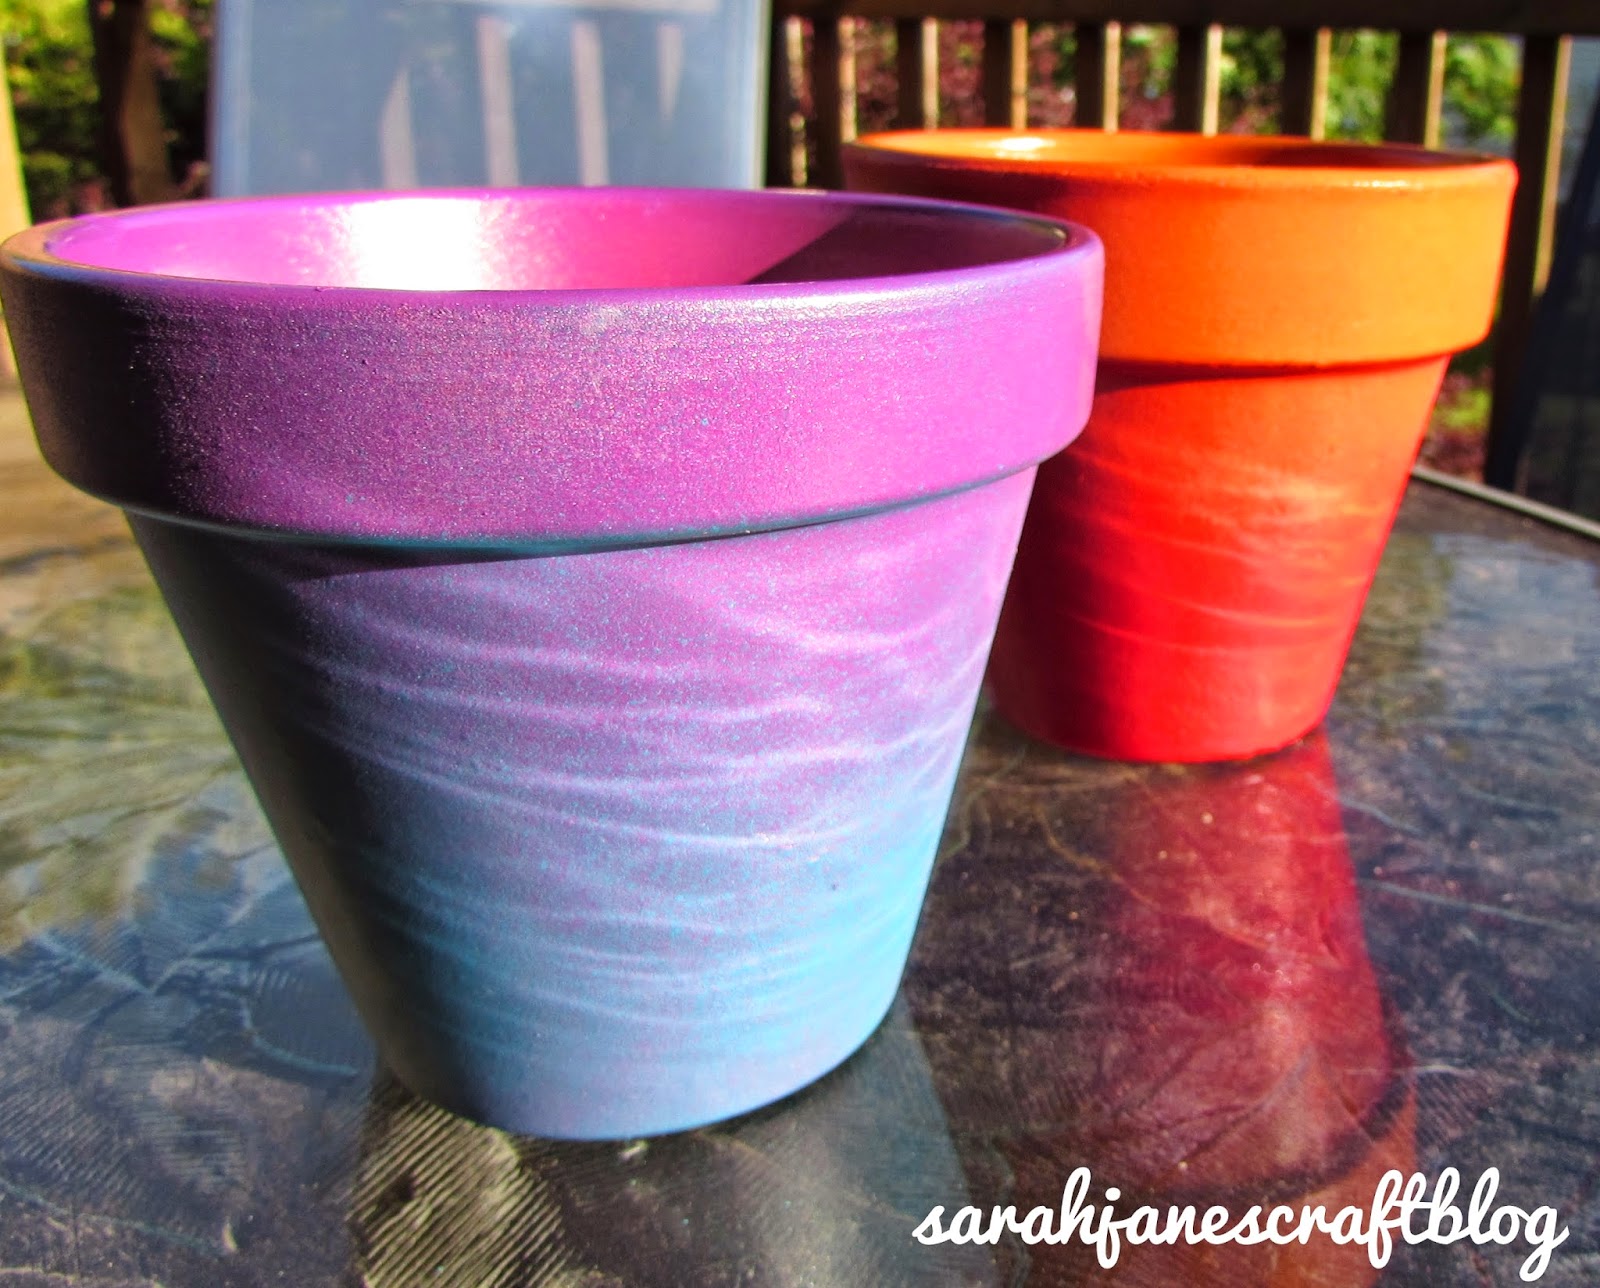
Image Via: Sarah Jane’s Craft Blog
7. Dripped Watercolor Terra-Cotta Pot
This pretty painting technique is so simple to do! At her blog, Grow Creative, Elise will walk you through all the steps to help you achieve the drippy, watercolor look you’re hoping for. Plant flowers with a bold color for big impact.
Image may be NSFW.
Clik here to view.
Image Via: Grow Creative
8. DIY Painted Terra-Cotta Pots
Simple and lovely, Chelsea — creator of Lovely Indeed — will show you the perfect way to paint and hang these metallic, color-blocked beauties. She adds a separate tutorial for potting plants and another for the macrame hanger. Mount to the ceiling and hang; lovely, indeed!
Image may be NSFW.
Clik here to view.
Image Via: Lovely Indeed
9. DIY: Marbled Terra-Cotta Pots
Marble nail treatments were all-the-rage a few years ago, but now it marbled plates, bowls, mugs, and yes, even planters. Alana Jones-Mann warns that this project, while beautiful, is VERY messy. Plan to have a dropcloth and maybe even disposable gloves. Use any combination of colors, and be sure to finish with a varnish!
Image may be NSFW.
Clik here to view.
Image Via: Alana Jones-Mann
When painting and dyeing terra-cotta, it’s good to remember it’s an absorbent material. You may need more supplies than you anticipated or may need to start with a neutral base coat before getting into any fun colors you intend to use. With that in mind, it’ll be beyond easy to complete these quick projects this weekend. Now just pick one!
Until next time,
~Bri